“Workflow” is an automated process in which tasks, information, and emails are triggered depending on pre-set parameters. Workflows boost productivity, reduce downtime. You constructed the workflow, and now it’s time to activate it. When you click the on button, you definitely feel nervous because it feels like you’re throwing a dart at a target. Here are some testing strategies to assist you determine whether your workflow is functioning effectively or whether there is room for improvement.
1. Test the Enrollment Criteria
To verify that you are targeting the proper audience, HubSpot allows you to examine a contact against your enrolment criteria. You may have a contact in thoughts while building a workflow who would be an excellent match for the workflow.
To see whether a contact meets the enrollment criteria of a workflow:
- In your HubSpot account, navigate to Automation > Workflows.
- Click the name of a workflow.
- Click the Enrollment triggers box.
- In the right panel, click Test criteria.
- In the dialog box, select the record that you want to test. Then click Test.
- The right panel will indicate if the record meets or does not meet the enrollment trigger criteria.

If a contact meets any of your enrolment criteria, a module will turn green, indicating that they will be included to your workflow. A module, on the other hand, will display red if the contact does not fulfil the criterion.
2. Test Branching Logic in the workflow
There are two approaches to testing longer workflows with several branches.
- You can Clone Your Workflow to Test Branching Logic.
- Applying Test Criteria to test cases against if/then branches.
I. Clone Your Workflow to Test Branching Logic
There are a few steps you may take to assure that the workflow performs as expected.
- Clone your workflow.
- Change all delays to five minutes.
- Delete all enrollment criteria.
- Turn the workflow on.
- Manually enroll yourself.
This allows you to perform the necessary measures to try out the various branches. If you discover that any adjustments are required, consider putting a longer delay between two emails to give yourself a week to make those changes.
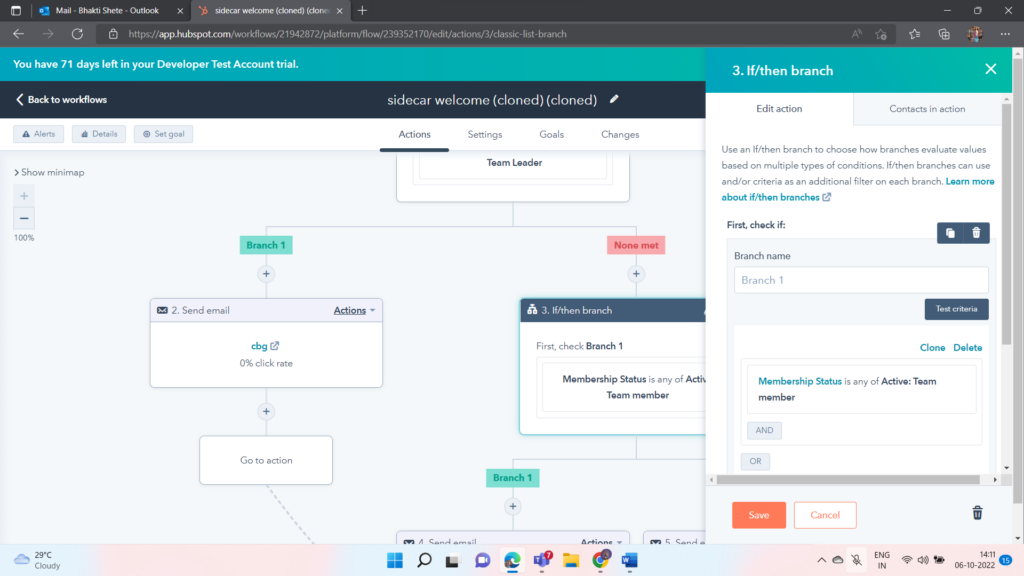
II. To test an individual if/then branch:
- In the workflow, click the if/then branch.
- In the right panel, click Test criteria.
- In the dialog box, select the record that you want to test. Then click Test [object].
- Test results will appear in the right panel.
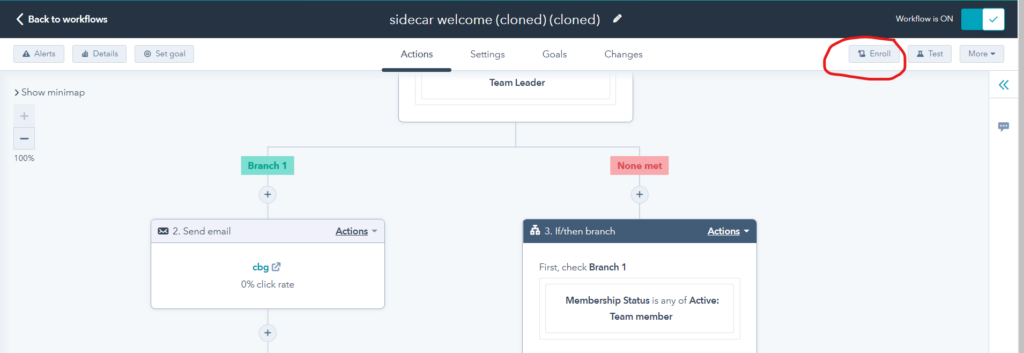
3. Utilize the Workflow Test Function
After assembling your workflow with all necessary emails and activities, you can use the test feature by selecting a contact to check how their workflow experience will be. You may view the dates, times, and branches that the following actions would take place in if the contact satisfied the enrollment requirements.
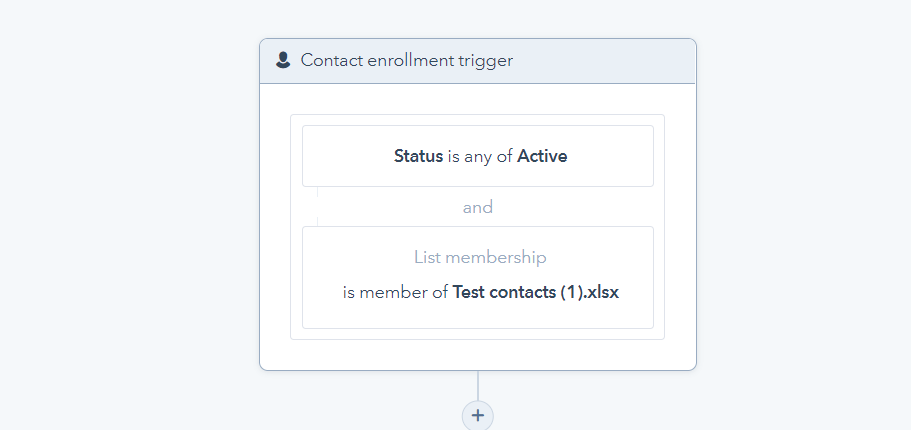
4. Create a Test contact list
A test contact static list must be created using test contacts. To test the workflow, we can add the Test contact static list as an additional trigger with all other logical triggers in workflow with “and” logic. such that when we activate the workflow, the workflow will only conduct actions or send emails to test contacts.
5. Test workflow using test Account
You can set up a test account that is identical to your real account. You must construct a workflow in the test account, and you may test it by triggering workflows in the test account. As it is an identical replica of the original account. This will offer us a final look at how our workflow functions, and if there is room for improvement, we can fix it in the actual account.
6. Send Test Emails
Just because you’re using the workflows tool doesn’t mean you should neglect email testing best practices. The only thing scarier than sending an email with spelling errors is sending it many times to multiple people as part of your procedure. Rechecked each email in your workflow. Send them to co-workers as well – an extra set of eyes is always beneficial in ensuring each email is polished and ready to go. You can send a test version as well of your marketing email team member or even yourself before you actually send out the email to your contacts.
To send a test email:
- In your HubSpot account, you have to navigate to Marketing > Email.
- Then, you have to hover over the name of a draft email and click Edit.
- In the upper right, you have to then click Send test email.
- In the right pane, you have to click the Choose one or more recipients dropdown menu in order to select recipients for your test email.
- Click Send test email.